Carrot Cake Oat Bars

Carrot Cake Oat Bars

I like to cook (a lot), but I love to bake. It’s true that I have an affinity for carbs in all forms, being able to whip up breads, cookies, and such is not the only reason I prefer baking. My perfectionist leanings thrive within the confines of a recipe. Where cooking is Picasso, baking is paint-by-numbers.

I like paint-by-numbers. Which is why I rarely deviate from a recipe. But some recipes just cry out to be adapted and made multiple different ways. I felt that way with homemade Clif Bars. Even though I only posted the Cinnamon Golden Raisin variety, I never made them the same way twice. There was a Chocolate Chip Coconut and a Trail Mix version, too.

These Oat Bars are the same way. I found the recipe on Pinterest, made it as per the recipe once, and then kept thinking of different flavor ideas.

The bones of these oat bars are a nutrient rich combination of rolled oats, whole wheat flour, and milk (of any sort). The need for butter in the original is eliminated by using unsweetened applesauce. They are sweetened with honey, making them perfect for No Sugar September and why I even found the recipe in the first place.

Carrot Cake Oat BarsSo, the Carrot Cake version? I had a ton of leftover carrot puree from stockpiling James’ baby food and wondered if it would be an acceptable substitute for the unsweetened applesauce in the oat bars. The idea snowballed from there…

Carrot PureeSidenote: Carrot puree is super easy to make (peel, chop, and boil two large carrots and then blend in a food processor), but I’d imagine canned pumpkin would be a great substitute in this recipe.

My mind immediately went to carrot cake (because I’ve been sugar deprived, perhaps?) and I played off the flavors and mix-ins that are traditionally found in carrot cake – cinnamon, nuts, and raisins. Now that I think of it, crushed pineapple would be a tasty addition, too, but that’s getting into Hummingbird territory and we can’t mix cakes now can we.

Walnut Grinder

Oat Mixture

Carrot Mixture

The end result of all this carrot oatiness is a dense, filling bar that is perfect to pack in a lunch, tuck in a carry on, or nibble on throughout the day. I’ve enjoyed mine with a slice of cheese or scoop of apple butter and a glass of milk. Tim takes them to work for an afternoon snack. They’d be amazing for a newly nursing mom who is in that eat everything, always hungry stage.

Carrot Cake Oat Bars

If you were wanting to make these a little desserty and still keep them refined sugar free, blend cream cheese and maple syrup together to spread on top and cut into squares.

And because I kept thinking of ways to adapt the original, I’ve got a Chocolate Peanut Butter version coming atcha soon. In the meantime, enjoy some Carrot Cake!

Carrot Cake Oat Bars

Carrot Cake Oat Bars
Author: Emily C. Gardner
Cook time: 35 mins
Total time: 35 mins
Serves: 8 bars
A nutrient rich, filling snack bar with no refined sugar. Enjoy them plain, with apple butter, cheese, or a little cream cheese/maple syrup frosting.
Ingredients
  • 2 cups old fashioned rolled oats
  • 1 cup whole wheat flour
  • 1 tablespoon ground cinnamon
  • 1 teaspoon ground ginger
  • 1 teaspoon allspice
  • 1 teaspoon baking powder
  • 1/4 teaspoon salt
  • 1/2 cup chopped walnuts
  • 1/2 cup raisins
  • 1 1/2 cups milk (any variety)
  • 1/2 cup carrot puree
  • 3 tablespoons honey
  • 1 large egg, beaten
  • 1 teaspoon vanilla
Instructions
  1. Preheat oven to 375 degrees F.
  2. Lightly coat an 8 x 8 inch baking pan with cooking spray and set aside.
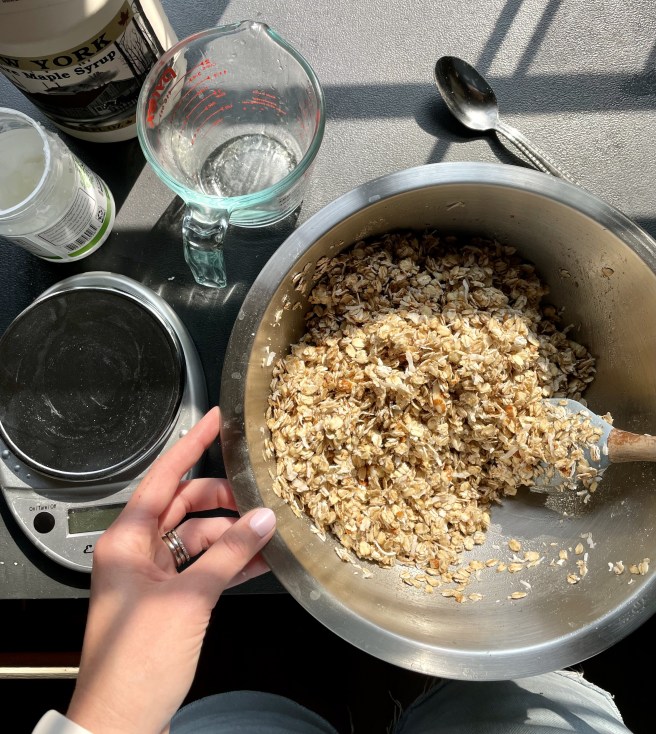
  3. In a large bowl, stir together oats, WW flour, cinnamon, ginger, allspice, baking powder, salt, walnuts, and raisins. (Be sure to separate the raisins to avoid gross raisin clumps in your bars.)
  4. In a saucepan over medium heat, whisk milk, carrot puree, honey, egg, and vanilla until the honey is melted and all the ingredients are combined. It will be a lovely shade of peach!
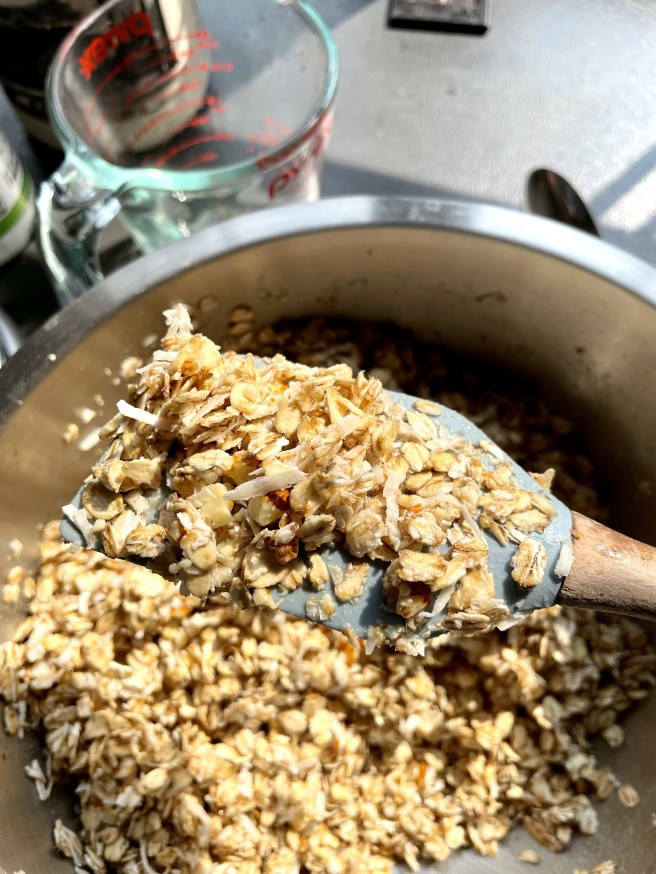
  5. Pour the liquid ingredients into the dry ingredients and stir until combined.
  6. Put batter in prepared pan. Bake for 35 minutes or until a toothpick comes out clean.
  7. Cool and cut into bars.
Notes
Any variety of milk or milk substitute will work. [br]I use an old fashioned nut grinder to get an even fine chop on my walnuts. [br]Pecans or almonds would be nice, too. [br]If you don’t have allspice, use 1/2 teaspoon of nutmeg.[br]You could totally use currants or golden raisins instead of raisins.


Simple Blonde Granola

Blonde Granola

But if you call me Anne, please call me Anne spelled with an E. “What difference does it make how it’s spelled?” asked Marilla with another rusty smile as she picked up the teapot. Oh it makes such a difference. It looks so much nicer. When you hear a name pronounced, can’t you always see it in your mind, just as if it was printed out? I can; and A-n-n looks dreadful, but A-n-n-e looks so much more distinguished. (Anne of Green Gables)

I feel the same way about my hair color. B-l-o-n-d looks dreadful and brusque, but b-l-o-n-d-e looks so much more distinguished and elegant. Either way you spell it, blonde carries a heavy weight around on its pretty shoulders. Blonde has a reputation for being light, airy, and shallow. But we all know plenty exceptions to the blonde stereotype, right?

For example, this granola. It’s light. It’s easy. But this Blonde also has substance and flavor that goes beyond its small ingredient list and fair exterior.

Blonde Granola

Blonde Granola

Now, I’m a huge granola fan, and in no way against the CrunchyPecanPumpkinFlaxWhiteChocolatePeanutButterRaisin type of granola. However, for my daily granola habit, I needed to exercise some restraint. And when we went sugar-free, I made a handful of not-so-delicious granolas that prompted me to create an everyday granola of my own with no refined sugar and a whole lot of flavor. I stripped down my Gingerbread Granola to make this simple blonde version.

Blonde Granola

You won’t find spices or brown sugar vying for your taste bud’s attention (or making your granola the more traditional brunette). It’s just old-fashioned rolled oats and sliced almonds getting a simple wash of maple syrup, coconut oil, and salt before spending some time under the dryer (um, in the oven).

The result is a pure granola goodness.

Blonde Granola

Don’t skip out on the salt. It lends a kettle corn, sweet caramely quality to the granola that is positively addictive. I’ve been enjoying mine on homemade pumpkin yogurt.

Blonde Granola

Simple Blonde Granola
Author: Emily C. Gardner
Prep time: 10 mins
Cook time: 1 hour 15 mins
Total time: 1 hour 25 mins
Serves: 5 cups
Ingredients
  • 4 cups old fashioned rolled oats
  • 1 cup sliced almonds
  • 1/4 cup + 2 Tablespoons maple syrup (110g)
  • 1/4 cup coconut oil (45g)
  • 3/4 teaspoon salt
Instructions
  1. Preheat oven to 250 degrees F.
  2. Line a baking sheet (preferably one with sides) with parchment paper or a silicone baking mat.
  3. In a large bowl combine oats, almonds, and salt.
  4. In a saucepan over medium heat, stir together maple syrup and coconut oil. Continue stirring until coconut oil is melted and fully incorporated with syrup.
  5. Pour over oat mixture and mix until all dry ingredients are moistened.
  6. Spread moistened mixture on prepared pan.
  7. Cook for 1 hour and 15 minutes, stirring two or three times throughout the baking process.
  8. Remove from oven and let cool completely before storing in an airtight container.

Homemade Cinnamon Golden-Raisin Clif Bars

Homemade Cinnamon Golden-Raisin Clif Bars.jpg

The first time I ate a Clif Bar was at the top of Vernal Falls in Yosemite. I was camping with my boyfriend’s (now husband) family. We had begun our hike with no goal in mind, but after a quick poll, we all determined it would be worth reaching the top. The Mist Trail offers the gamot of experiences – slippery rocks, skinny pathways, and sweeping vistas – and reaching the top was a physical, as well as mental, accomplishment.

We navigated those last rock stairs, pressing to the inside of the mountain to let others pass who were headed back down, and stepped onto a sunshine soaked plateau. I was in awe of the powerful surge of water flinging itself from such a height. I was also hungry! Tim had had the presence of mind to bring a couple snacks, so it was at the top of that rushing waterfall that I bit into my first Clif Bar. Maybe it was the endorphins from our climb speaking, but that Chocolate Chip Clif Bar was so ding dang delicious.

I’ve been a Clif Bar fan every since that mountain-top experience. We buy them in bulk from Costco (I was sad to see Chocolate Chip Peanut Butter disappear from the variety pack.) and I eat one almost every day. My favorite flavor rotates, but White Chocolate Macadamia and Coconut Chocolate Chip compete for the top spot often.

Homemade Clif BarsEven in the Costco pack, Clif Bars aren’t always practical for our tight budget and I’ve always wondered if I could replicate them at home to save some pennies. I’ve searched Pinterest multiple times but haven’t found what I was looking for, until last week.

Most copycat Clif Bar recipes didn’t have crispy rice cereal as an ingredient, despite that being a listed ingredient in the real thing. I wanted a recipe that had oats, crispy rice cereal, and didn’t rely on date paste as a sweetener. In walks Liv Lives Life with just what I was looking for, and a calorie count to boot.

The method is simple and relies on pantry staples. Oats and crispy rice cereal make up the bulk of the bars with flax meal for added nutrition. Honey and nut butter (I use crunchy peanut butter) act as the binder. There’s infinite possibilities for add-in customization, so you can recreate your favorite Clif Bar flavor or make up your own.

Homemade Cinnamon Raisin Clif Bars 1Now, these don’t quite have the Clif Bar texture, but the delicious factor makes up for any nuance lacking in the texture department. You could also try quick cookie oats, instead of old fashioned, to get a more dense crumb.

I adapted Liv’s basic Clif Bar method to create these Cinnamon Golden-Raisin beauties. I used a dram of Vanilla Butternut extract instead of vanilla which added a hint of butterscotch to these bars. Any type of raisin would work in this recipe, but I like the sweetness of golden raisins.

These Cinnamon Golden-Raisin Clif Bars are a great supplement to the pre-packaged variety. Plus, they taste like cookies…

Homemade Cinnamon Golen Raisin Clif Bars

Homemade Cinnamon Golden-Raisin Clif Bars
Author: Emily C. Gardner
Prep time: 10 mins
Total time: 10 mins
Serves: 8
Oatmeal raisin cookies in a simple, homemade Clif Bar form.
Ingredients
  • 1/2 cup peanut butter
  • 1/3 cup honey
  • 1 dram (3/4 teaspoon) vanilla butternut extract or 1 teaspoon vanilla
  • 1 1/4 cups crisp rice cereal
  • 1 cup old fashioned oats
  • 2 tablespoons flax meal
  • 1 teaspoon cinnamon
  • 1/2 cup golden raisins
Instructions
  1. Line an 8 x 8 inch pan with waxed paper (cut one strip that fits the bottom of the pan and allow some extra to stick up above the rim of the pan to use as handles). Set aside.
  2. In a saucepan, heat peanut butter and honey over medium heat until melted. Take off heat and add vanilla butternut flavoring. Stir to combine. Allow to cool while you mix together the other ingredients.
  3. In a large bowl, stir together the rice cereal, oats, flax meal, cinnamon, and golden raisins. Mix well – the flax meal has a tendency to stay clumped together. Add the peanut butter mixture to the oat mixture and stir until all the ingredients are well coated.
  4. Pour batter into the prepared pan and press down firmly with a spatula until the top is even. You want to press down as firmly as you can so the bars are dense and hold together when cut.
  5. Let the bars cool in the refrigerator for at least 30 minutes before cutting. To cut, lift the mixture out of the pan with wax paper handles. Cut into desired size bars – I liked what 8 pieces produced.
  6. Wrap individually in plastic wrap and store in refrigerator. (You don’t need to eat them cold, they just stay better in the fridge.)
Serving size: 8 bars Calories: 231

//pagead2.googlesyndication.com/pagead/js/adsbygoogle.js //

Low-Fat Banana Bundt Cake

Low-Fat Banana Bundt Cake

People get really loyal about their banana bread recipes. I’m no exception. I use my Auntie Lo’s recipe almost exclusively. However, there are times when branching out is a good thing. This Banana Bundt Cake is no exception. (I realize this is technically a cake, but it’s banana and you could bake it in a loaf pan, so it qualifies as a banana bread in my mind.)

When you’re a sweet toothed, carb addict who is trying to make wise food choices, low-fat and cake in the same recipe is a beautiful partnership. My mom had already vetted a couple muffin recipes from the Moosewood Restaurant Low-Fat Favorites cookbook I talked about in this month’s Twitterature post, so we were intrigued by the banana cake that fit that glorious description.

Many things can go wrong with low-fat baked goods. Some aren’t sweet enough (for me), others have a weird texture due to reduced amounts of butter and/or eggs. Some just have that “too-healthy” stank on them. But this dense, flavorful cake? None of the above.

Banana Bundt Cake Ingredients

Bananas and unsweetened applesauce add moistness to balance the reduced oil content. Brown sugar’s molasses undertones provide strong flavor and just enough sweetness to make this a viable dessert. The whipped egg white to egg yolk ration is perfect, cutting out some cholesterol while still maintaining a tight, rich crumb. I’m a sucker for anything with nutmeg (homey and festive, right?), and I loved how the unexpected spice in this cake made the banana flavor more complex.

Banana Bundt Cake Process

The recipe calls for baking in a Bundt pan (which is how I baked it), but my mom has made it twice in a 9-inch springform with great results. Slices of any shape are perfect for tucking into lunch boxes or nibbling on in the afternoon. I love mine with a plop of peanut butter and a cup of tea in the morning. But, it is a cake, so we’ve served it with a cloud of lightly sweetened whipped cream to rave reviews. I can also envision it with a dusting of powdered sugar and berries or a drizzle of homemade caramel sauce.

whipped cream

Whatever way you serve it, this Low-Fat Banana Bundt Cake is worth having in your banana repertoire. As with most banana baked goods, it tastes even better then next day.

Budget tips:

  • Unless your family eats a lot of unsweetened applesauce, buy a pack of the individual snack sized applesauces. You’ll have enough to make three cakes without worrying about the applesauce spoiling.
  • Buy overly ripe bananas instead of waiting for regular ones to get hinky. Grocery stores sell bags of brown bananas for cheap. You can even freeze mashed banana to use later (which is what you see in the photo of ingredients above).

Do you have a favorite banana baked good recipe?

Low-Fat Banana Bundt Cake

Banana Bundt Cake recipe

A dense and delicious banana cake for anytime of day! Adapted from Moosewood Restaurant Low-Fat Favorites: Flavorful Recipes For Healthful Meals

  • 2 1/2 cups unbleached flour
  • 2 teaspoons baking powder
  • 1 teaspoon salt
  • 1/2 teaspoon nutmeg
  • 3/4 cup brown sugar
  • 2 egg yolks
  • 1 cup mashed bananas
  • 3/4 cup unsweetened applesauce
  • 1/3 cup vegetable oil
  • 1 teaspoon vanilla extract
  • 4 egg whites

Preheat oven to 350 degrees F.

Lightly coat a 10-inch Bundt pan (or 9-inch springform) with cooking spray.

In a large mixing bowl, stir together the flour, baking powder, salt, nutmeg, and brown sugar. Mix well and set aside.

Combine the egg yolks, bananas, applesauce, oil, and vanilla. Add the banana mixture to the dry ingredients and stir just until evenly blended.

Beat the egg whites until stiff but not dry. Gently fold the egg whites into the banana batter with a spatula. Pour into prepared pan.

Bake for 60 minutes, until the cake begins to pull away from the sides of the pan and a knife inserted into the center comes out clean. Cool on rack for 10 minutes and then invert onto a plate.

Store in an airtight container.

Serves 16

Per serving: 140 calories, 3.5 grams protein, 5.8 grams fat, 18.6 grams carbs

//pagead2.googlesyndication.com/pagead/js/adsbygoogle.js

(adsbygoogle = window.adsbygoogle || []).push({});

Raspberry Brie Bites

Raspberry Brie Bites I wish I could take credit for these Raspberry Brie Bites, but they were the brain child of my sweet friend Christie. She made them for a Fall party in 2011, which ended up to be the day before Tim and I got engaged! (That’s her on my right (below), holding the apple…). She makes some of the most delicious little appetizers and these are no exception. After having them at that party two years ago, Tim and I have made these jammy, cheesy puffs a dozen times, especially during the holidays.

The recipe is really straightforward, but this simple combination of flavors is addicting. Plus, they’re just cute. They remind me of mini brie en croutes with a sweet touch from the jam. Three ingredients and ten minutes later Raspberry Brie Bites are in the oven. By the time you tidy up the kitchen, the bites are golden and bubbling.

Raspberry Brie Bites 4

Once you start making them, you’ll think of endless variations. I LOVE Brie, but you could sub any soft cheese. Cream cheese would be great, as would gorgonzola for a more savory bite. Same goes with the jam. Try fig preserves, blackberry jam, or a chutney of some sort. If time had allowed yesterday, I would have fried up some bacon to crumble inside this batch.

Make sure you plan ahead a bit – the puff pastry needs to thaw. A final warning: You will be tempted to pop one of these bites in your mouth the minute they come out of the oven. Resist or be scarred by the molten hot jam lava…

Raspberry Brie Bites

  • 1 package (2 sheets) frozen puff pastry, I use Pepperidge Farm
  • Brie cheese, approx 3 oz depending on how big your chunks are
  • Raspberry jam

Preheat oven to 400 degrees. Lightly grease a mini muffin tin or two.

Let the puff pastry thaw in the refrigerator (great) or countertop (good) until the sheets are workable but still cold.  One sheet at a time, unfold the pastry and lay flat on a lightly floured surface. Roll the pastry sheet out until the folds are smooth and the sheet has stretched a bit. You don’t have to be exact. Cut the sheet into 12 pieces. Line muffin cups with the pastry pieces. Repeat with the second sheet so you have 24 all together.

Raspberry Brie Bites

Trim the rind off of the Brie and cut into small chunks. Mine end up being 1/2″ cubes. Place one chunk of brie in each pastry cup. Drop a teaspoon of jam into each cup. Now comes the fun part! Squeeze the tops of the pastry together to create little packages.

Raspberry Brie Bites 2

Bake the bites for 20-25 minutes or until just golden. Let them cool in the pan for 5 minutes and then take the bites out. Eat warm or at room temperature. We’ve never had any leftover so I can’t vouch for how they weather an overnighter.

Yield: 24 bites

Raspberry Brie Bites 5