Caprese Egg Puff

Caprese Egg Puff

I consider myself some sort of green-black thumb hybrid. I excel at dealing with the dead things (weeding is therapeutic), but the growing/keeping alive part is intimidating. So, I count my gardening efforts this Summer to be a major success.

What do those gardening efforts look like, you ask? Resuscitating a vine whose bloom I was positive had faded, fighting the heat to keep two tomato plants alive, and nurturing a basil plant from infancy to flourishing adulthood.

Basil

The latter was my shining gardening accomplishment. Mostly because my mom was the one who actually discovered the vine wasn’t dead and there’s a distinct difference between alive and thriving when it comes to my tomatoes. But the basil plant, in it’s hot pink, dollar store beach bucket has gone from baby to burgeoning over the past three months and I am oh, so proud.

What makes the basil success even sweeter (herbier?) is that we’ve used it! Tiny slices made their way into cheesey eggs and crockpot marinara. Handfuls went into a delicious pesto we ate on homemade pizza.

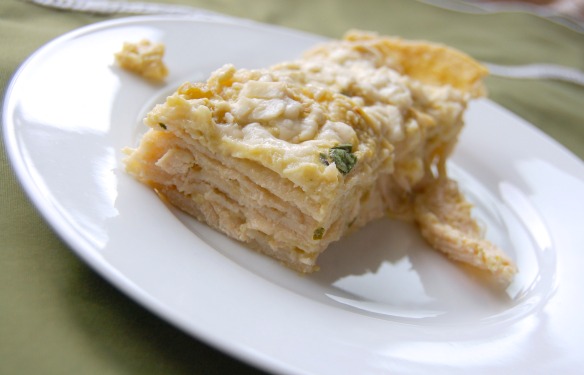
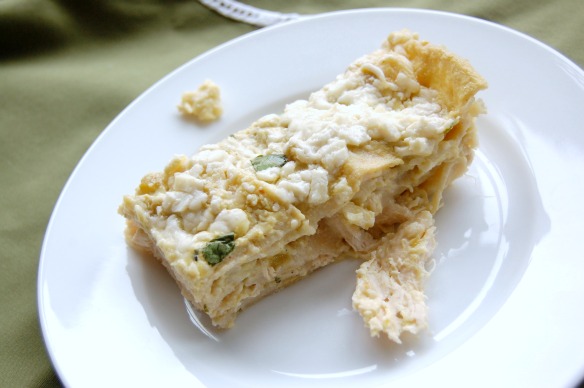
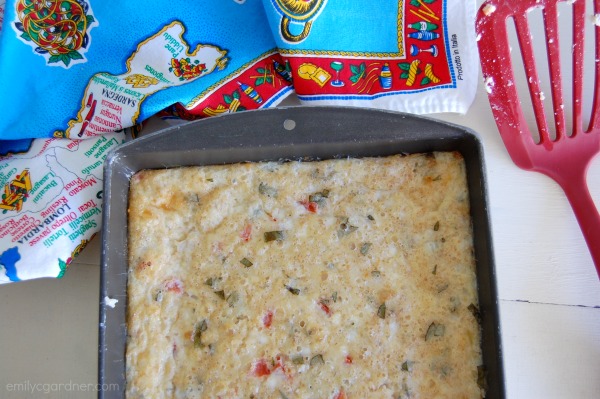
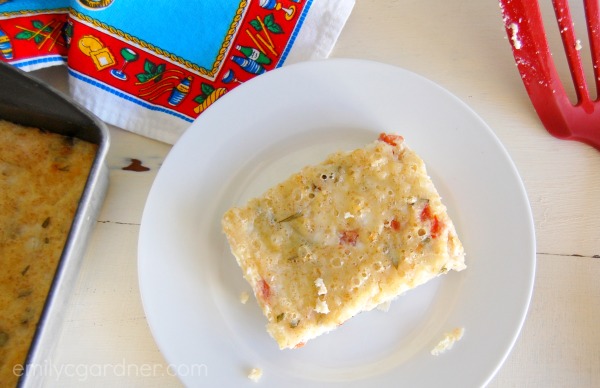
My endless supply of basil prompted this new take on Chile Egg Puff. It’s cheesy, eggy foundation is the perfect base for endless variations. This particular version plays on the classic Italian caprese salad of mozzarella, tomatoes, and basil.

I nixed the chiles from the original, adding diced fresh tomatoes and tons of julienned basil in their stead. Out went the cheddar and in came the mozzarella.

Caprese Egg PuffCaprese Egg Puff

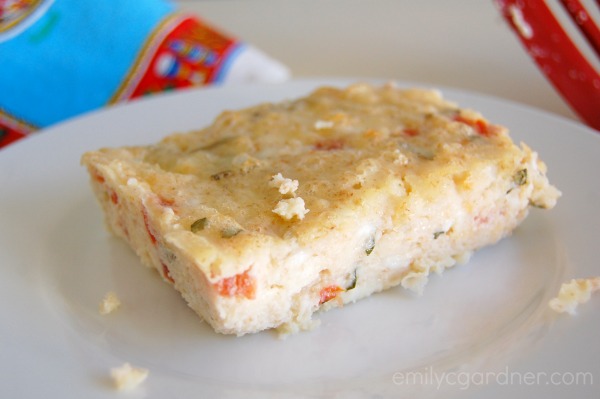
It may be sacrilege to the memories tied to the original Chile Egg Puff, but I might like this version better. Maybe that’s the basil pride talking… Either version has the same appeal – a protein packed, cheese riddled egg soufflé perfect for any meal of the day. Both egg puffs have been great to have around during No Sugar September.

A note about the tomatoes: I’m fairly particular about removing all tomato boogers before dicing. Cut tomatoes into quarters and run your thumb around the inside to loosen the snotty seeds. Discard and proceed with dicing your now booger free tomatoes.

To chiffonade basil: Stack basil leaves together. Roll into a little basil log. Place your basil log on a cutting board and hold in place. Slice through the basil log as thinly as possible. Separate all the tiny basil ribbons you’ve just created and resist the urge to throw into the air like they were dollar bills.

Caprese Egg Puff

Caprese Egg Puff
Author: Emily C. Gardner
The flavors of a garden fresh caprese salad puts an Italian spin on this delicious and hearty egg soufflé.
Ingredients
  • 10 eggs
  • 1/2 cup flour (whole wheat works great)
  • 1/2 teaspoon salt
  • 1 teaspoon baking powder
  • 2 cups (16 oz) cottage cheese
  • 4 cups (1lb) mozzarella cheese
  • 1/4 cup butter, melted
  • 1 cup diced fresh tomatoes
  • 1/4 – 1/2 cup basil, chopped (I used 1/2 cup, but I love basil…)
Instructions
  1. Preheat oven to 350 degrees F. Grease a 9 x 13 inch pan, set aside.
  2. In a medium bowl, beat eggs until light and lemon colored. Add flour, salat, baking powder, cottage cheese, mozzarella cheese, and butter. Mix thoroughly. Fold in tomatoes and basil.
  3. Pour mixture into prepared pan. Bake for 35 minutes or until top is golden and center appears firm.
  4. Serve immediately. (Negotiable. I like it at every temperature. But, it’s the most soufflé like straight from the oven.)


3 Ways to Jazz Up Store Bought Pizza Crust

store bought pizza crust

For me, cooking is a joy and a stress reliever. I love the process – gathering, mixing, stirring, chopping, creating – but sometimes I don’t have time to immerse myself in that process. And there are some days when the process I enjoy so much just sounds burdensome. Enter one of my new, faux-process dinners: pizza using a store bought crust.

Pizza crust isn’t too difficult to whip up, but on those nights when I’m tired or low on time, store bought crust is a short cut that allows me to serve a home cooked meal with little effort.

Bread is my culinary best friend, so my tastes gravitate towards pudgy, thick pizza crust. However, my love handles don’t always appreciate my carb-laden chum, so Tim and I have been making our pizzas on whole wheat, thin crusts we found at Target. (This isn’t a sponsored post, just FYI.) It’s square, fairly low calorie, and thick enough to be chewy not crackery.

I’m always down for the standard cheese and pepperoni, but it makes me feel more grown up to be creative with our toppings. Plus, that helps me justify having pizza twice in a week (because you have to use both crusts, right…).

Here are 3 ways we’ve jazzed up our store bought pizza crust:

3 Ways to Jazz Up Pizza Crust

Fig Proscuitto Pizza – based on this from Pioneer Woman.

Sweet, salty, gooey with a fresh bite from the arugula. Eat it with a fork.

  • Crust
  • Fig Preserves – Bonne Maman is widely available and super tasty.
  • Proscuitto – crisped in skillet and crumbled.
  • Mozzarella
  • Bake at 400 until cheese is melted, 10 ish minutes.
  • Top with chopped arugula and shaved Parmesan.

Bacon and Egg Pizza – based on this in Food Network Magazine.

Breakfast for dinner is a favorite. Breakfast AND pizza? Yes, please.

  • Crust
  • Salsa
  • Red bell peppers, diced and sautéd until soft
  • Mozzarella
  • Bacon, cooked and chopped
  • Make wells in toppings and crack an egg into each well.
  • Bake at 400 until egg whites are opaque. Check after 20 minutes.

Peppered Ricotta and Roasted Veggie Pizza with Red Wine Reduction

Roast all your leftover vegetables and throw them on top of some creamy ricotta. A drizzle of balsamic vinaigrette would be a tasty substitution for the red wine reduction. 

  • Crust
  • 1 cup ricotta cheese mixed with freshly cracked pepper
  • Roasted veggies (we did 1 yellow onion, 1 red bell pepper, 1 small sweet potato)
  • Bake 400 until heated through, 15 minutes
  • Drizzle with red wine reduction sauce.

Is pizza in your meal rotation? Do you make your own crust? What are your favorite toppings?

When I have time to make homemade pizza crust, I’m going to follow these 9 tricks for making amazing pizza from Erika over at Let Why Lead!

Annette’s Enchiladas

Annette's Enchiladas

If you read Sunday’s post you know I’m trying to be intentional about inviting people over for dinner, despite how vulnerable that makes me feel. My dear friend Sarah came to visit in March and we took the opportunity to do just that – cook for others and feel vulnerable in the process (well, at least I did…). We decided to make a meal from the recipes found in Shauna Niequist’s new book Bread and Wine and invited some acquaintances who Tim and I were hoping would become friends. Baby steps to community…

Sarah and I made three of Shauna’s recipes and all of them were winners. I shared her Blueberry Crisp recipe (which my mom is now hooked on) and wanted to share another of her delicious recipes that we made – Annette’s Enchiladas.

Annette's Enchiladas 2

Tim and I love Mexican food so I immediately latched onto this enchilada recipe while reading Shauna’s book. I was intrigued by the green sauce and thankful that the enchilada preparation didn’t necessitate rolling.

Annette’s Enchiladas is a casserole style dish with a zesty sauce made of sour cream and chili verde. Corn tortillas are layered with sauce, a hefty dose of cheese, and shredded chicken. Several layers later, some time in the oven, and we had a large pan of gooey enchiladas with a perfect little spicy kick. Don’t forget the sprinkle of cilantro, it really brightens up the flavor!

Annette's Enchiladas 3

Annette’s Enchiladas 

            adapted from Shauna Niequist’s recipe in Bread and Wine

  • 1 cup sour cream
  • 1 28-oz can green enchilada sauce (Las Palmas is recommended)
  • 2 4-oz cans diced green chilies
  • 3 cups cooked chicken, shredded or diced
  • 2 cups Monterey Jack cheese, grated
  • 12 corn tortillas (you could use flour)
  • 1 cup chicken broth
  • Cilantro

Preheat oven to 350 degrees.

Simmer the chicken broth in a skillet, and before placing each tortilla in the pan, use tongs to pass the tortilla through the broth for just a few seconds. If you leave the tortillas in the broth for too long, they’ll fall apart, so just dip each one in for a few seconds to soften it before putting it in the enchilada pan.

Mix green sauce with chilies and sour cream. Smooth 1 spoonful of the sauce mixture around the bottom of a 9 x 13 inch pan.

Layer 4 tortillas over the first layer of sauce. After tortillas, add half the chicken, then one-third of the sauce, then one-third of the cheese. Repeat one more time so there are two full layers.

Finish with a layer of 4 more tortillas, the remaining third of the sauce, and the remaining third of the cheese.

Bake until warmed through and the cheese is melted, about 30 to 35 minutes. Let sit at least 15 minutes before cutting. Top with chopped cilantro.

{Like Shauna says, this is indeed comfort food and just as delicious hot as it is straight from the fridge as a midnight snack…}

Serves 6 generously

//pagead2.googlesyndication.com/pagead/js/adsbygoogle.js //