Annette’s Enchiladas

Annette's Enchiladas

If you read Sunday’s post you know I’m trying to be intentional about inviting people over for dinner, despite how vulnerable that makes me feel. My dear friend Sarah came to visit in March and we took the opportunity to do just that – cook for others and feel vulnerable in the process (well, at least I did…). We decided to make a meal from the recipes found in Shauna Niequist’s new book Bread and Wine and invited some acquaintances who Tim and I were hoping would become friends. Baby steps to community…

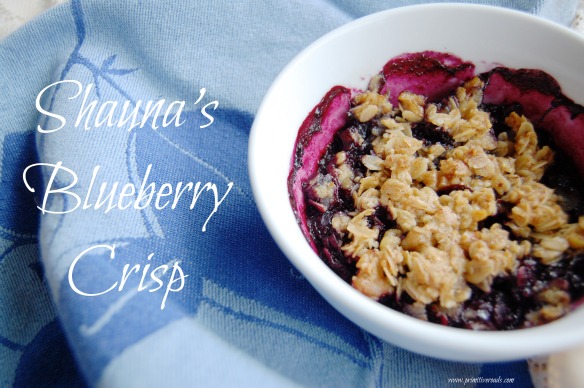
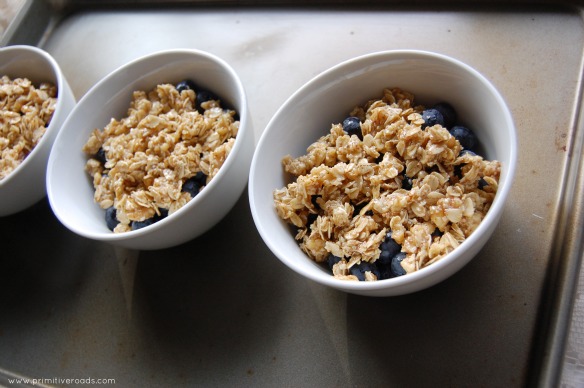
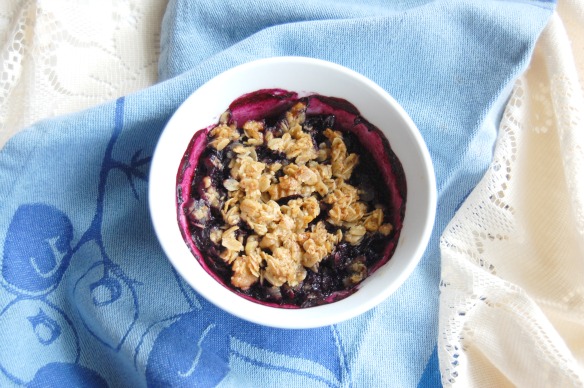
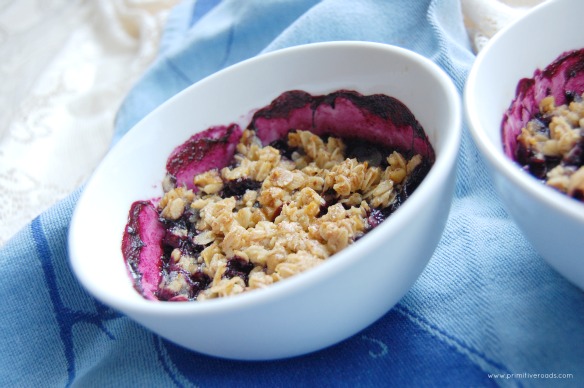
Sarah and I made three of Shauna’s recipes and all of them were winners. I shared her Blueberry Crisp recipe (which my mom is now hooked on) and wanted to share another of her delicious recipes that we made – Annette’s Enchiladas.

Annette's Enchiladas 2

Tim and I love Mexican food so I immediately latched onto this enchilada recipe while reading Shauna’s book. I was intrigued by the green sauce and thankful that the enchilada preparation didn’t necessitate rolling.

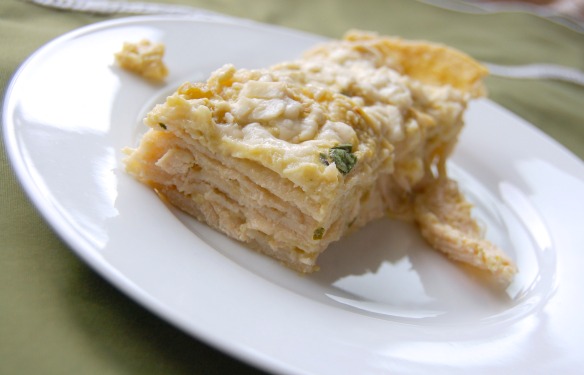
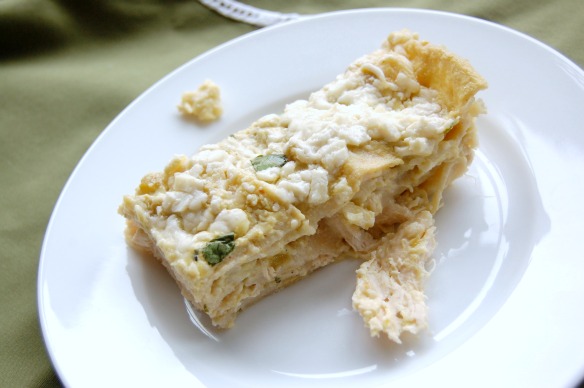
Annette’s Enchiladas is a casserole style dish with a zesty sauce made of sour cream and chili verde. Corn tortillas are layered with sauce, a hefty dose of cheese, and shredded chicken. Several layers later, some time in the oven, and we had a large pan of gooey enchiladas with a perfect little spicy kick. Don’t forget the sprinkle of cilantro, it really brightens up the flavor!

Annette's Enchiladas 3

Annette’s Enchiladas 

            adapted from Shauna Niequist’s recipe in Bread and Wine

  • 1 cup sour cream
  • 1 28-oz can green enchilada sauce (Las Palmas is recommended)
  • 2 4-oz cans diced green chilies
  • 3 cups cooked chicken, shredded or diced
  • 2 cups Monterey Jack cheese, grated
  • 12 corn tortillas (you could use flour)
  • 1 cup chicken broth
  • Cilantro

Preheat oven to 350 degrees.

Simmer the chicken broth in a skillet, and before placing each tortilla in the pan, use tongs to pass the tortilla through the broth for just a few seconds. If you leave the tortillas in the broth for too long, they’ll fall apart, so just dip each one in for a few seconds to soften it before putting it in the enchilada pan.

Mix green sauce with chilies and sour cream. Smooth 1 spoonful of the sauce mixture around the bottom of a 9 x 13 inch pan.

Layer 4 tortillas over the first layer of sauce. After tortillas, add half the chicken, then one-third of the sauce, then one-third of the cheese. Repeat one more time so there are two full layers.

Finish with a layer of 4 more tortillas, the remaining third of the sauce, and the remaining third of the cheese.

Bake until warmed through and the cheese is melted, about 30 to 35 minutes. Let sit at least 15 minutes before cutting. Top with chopped cilantro.

{Like Shauna says, this is indeed comfort food and just as delicious hot as it is straight from the fridge as a midnight snack…}

Serves 6 generously

//pagead2.googlesyndication.com/pagead/js/adsbygoogle.js //

Shauna Niequist’s Blueberry Crisp

Shauna's Blueberry CrispI am a huge fan of Shauna Niequist and her writing. Cold Tangerines and Bittersweet were fantastic books that I will read over and over, so when I found out she was writing her third book and it was about food and community (two things I’m passionate about), I was super excited.

Even though I wasn’t together enough to get my post about Bread and Wine out early, I received an advance copy of the book a couple months ago. My friend Sarah had also gotten an early copy of Bread and Wine so when she came to visit in March, I thought it would be fun to make some of Shauna’s recipes together (more on that soon!).

Some new friends of ours came over and we feasted on Annettes Enchiladas, Esquites, and Blueberry Crisp. Everything turned out wonderfully, but I couldn’t get enough of that blueberry crisp.

Blueberry Crisp unbakedBlueberry Crisps

Tim and I got some treasured Purple Gold as a welcome gift when we first moved to Coeur d’Alene and I’ve used it sparingly. Shauna mentions that the crisp is easily adaptable for many fruits, so I decided to use the last of those treasured berries to make a huckleberry version.

Mmm, wow! Five of us polished off the entire 8×8 pan with ease. I made another batch with blueberries later that week. Both were fabulous.

Two Blueberry CrispsIndividual Blueberry Crisp

The topping is a mixture of almond meal, oats, oil, maple syrup and chopped nuts. I about croaked at the price of a little bag of almond meal so I made my own – just grind almonds in a food processor until they look like sand. Be careful not to make almond butter, though.

Layer the topping over a few cups of fruit and bake until bubbly. All the while your house will smell divine. The fruit combined with maple syrup from the crisp topping creates the perfect just sweet enough dessert (or breakfast). We served ours warm with vanilla ice cream at dinner and I ate mine straight from the fridge at breakfast.

I will absolutely be making this again and again.

Shauna Niequist Blueberry Crisp

Shauna Niequist’s Blueberry Crisp
Author: Emily C. Gardner
Prep time: 10 mins
Cook time: 35 mins
Total time: 45 mins
Serves: 4-6
The recipe could easily be doubled and baked in a 9 x 13 inch pan. Find this and other delicious recipes in Bread and Wine.
Ingredients
  • 4 cups blueberries (or almost any fruit), frozen okay
  • 1 cup old-fashioned oats
  • 1/2 cup nuts, chopped (walnuts and pecans work great)
  • 1/2 cup almond meal
  • 1/4 cup maple syrup
  • 1/4 cup olive oil
  • 1/2 teaspoon salt
Instructions
  1. Preheat oven to 350 degrees.
  2. Mix together oats, nuts, almond meal, syrup, and salt with a fork.
  3. Pour berries into an 8 x 8 pan, and then layer the crispy topping over it.
  4. Bake for 35 – 40 minutes, or up to 10 minutes longer if topping and fruit are frozen, until fruit is bubbling and topping is crisp and golden.

//pagead2.googlesyndication.com/pagead/js/adsbygoogle.js //

Oatmeal Muffins

Oatmeal Muffins

Betty Crocker was a common fixture in our kitchen growing up. Her brownie recipe was perpetually open and had batter splotches instead of a bookmark. The other recipe I could flip to easily in that cookbook {because of the broken-in spine} was oatmeal muffins. Oatmeal Muffins showed up with many meals, but it was guaranteed to be on the table whenever mom made macaroni and cheese.

Everyone needs a tasty, basic muffin recipe in their baking arsenal. This was ours and this should be yours.

If the buttery outer crust and tender insides don’t win you over immediately, you won’t be able to resist the simple ingredients and throw together process of these Oatmeal Muffins.

Oatmeal MuffinI went through a phase in high school where I’d bake a batch of oatmeal muffins in jumbo muffin tins and have a briefly warmed muffin with a tall glass of milk for breakfast every day. Every forkful felt nourishing and rich without weighing me down with sweetness.

You can serve these craggy muffins with any meal and with virtually any condiment {jams, PB, honey, Nutella, cream cheese… you get the point}.

Oatmeal Muffin Upclose

Even though oatmeal muffins are simply perfect by themselves, they are also a great blank canvas for sweet and savory mix-ins. Can’t you just imagine mini chocolate chips and lightly toasted coconut  lending a touch of Mounds bar charm to these muffins? Or, a healthy mound of grated parmesan and cracked black pepper enhancing the earthy oat flavor?

Oatmeal Muffins 2

Despite the copious amounts of time I’ve made this recipe, I’m still shocked that the lumpy, slightly runny batter turns into these glorious muffins. Small chunks of shortening melt into the muffin, transforming humble oats into soft buttery bites.

Just like my mom’s best meal, whenever I make macaroni and cheese, oatmeal muffins are a non-negotiable part of dinner. You’ll also love these with soup in the winter and salads in the summer.

Oatmeal Muffins Split

Oatmeal Muffins  {adapted from Betty Crocker’s Cookbook}

  • 1 cup old fashioned oats
  • 1 cup all purpose flour
  • 1 teaspoon baking powder
  • 1/2 teaspoon baking soda
  • 1 teaspoon salt
  • 3/4 cup mix-ins (optional)
  • 1/3 cup shortening
  • 1/2 cup brown sugar
  • 1 large egg
  • 1 cup buttermilk

Preheat oven to 400 degrees F.

Stir together oats, flour, baking powder, baking soda, salt, and mix-ins in a bowl and set aside.

Beat Crisco, brown sugar, and egg together with an electric mixer. Add dry ingredients to shortening mixture, alternating with buttermilk, until just combined.

Fill lightly greased muffin tins with batter, 3/4 full. Bake 20-25 minutes until just golden brown. Remove from muffin tins immediately and cool on wire racks.

Store in airtight container.

Don’t miss the rest of the recipes from My Mom’s Best Meal!

Mom’s Applesauce

Mom's Homemade Applesauce | Primitive RoadsWe subscribed to Taste of Home for a short stint when I was in Jr. High. I spent endless hours reading every single word of those magazines. Pouring over pages full of delicious, not so health conscious recipes was the beginning of my cookbook obsession, I think.

Homemade Applesauce | Primitive RoadsMy favorite column in Taste of Home was, and is still, My Mom’s Best Meal. Readers share the recipes that showcase their mom’s best home cooked meal. There’s heritage and story, flavor and tradition in each column’s tribute to a mom and her best meal. The selected recipes speak of time around the table, of hospitality and love.

Mom's Homemade Applesauce | Primitive RoadsThough I no longer get a Taste of Home in my mailbox every month, I’ve often considered what I would choose for my mom’s best meal. My mom is a phenomenal cook/baker/entertainer so I have plenty of options. However, I keep returning to one meal – comfort food at its best – that was a staple in our home growing up.

My Mom’s Best Meal

In the coming weeks, I’ll be sharing my mom’s best meal, one recipe at a time. I’m starting today with my mom’s applesauce.

DSC_0393

More often than not, a jar of Mott’s Cinnamon Applesauce graced our table. It was an especially good accompaniment to pork chops and rice pilaf (another favorite meal of mine). It was a huge treat when mom made applesauce from scratch.

When my mom explained the process, I was shocked to find out how easy it was to make your own applesauce. The hardest part is peeling the apples and that’s more time consuming than difficult. The time is a small price to pay for the fresh, pure taste of homemade applesauce.

DSC_0390

Mom's Applesauce | Primitive Roads

Now, this isn’t a condiment like the Crockpot Apple Butter I shared in December, which you can spread on anything. Homemade applesauce is chunky and fresh compared to a concentrated, thick apple butter. This is a perfect side dish for any meal and when you make it yourself, you can feel good about feeding it to your family – from babies to grandparents.

Mom’s Homemade Applesauce

  • 8 apples, Golden Delicious are a good choice
  • 1 cup water
  • 1/3 cup brown sugar
  • 1/4 teaspoon cinnamon

Peel apples and cut into large chunks. Place apples in a large saucepan with water. Bring to boil over high heat, stirring occasionally. Reduce heat, cover pan and simmer gently for 20 minutes, or until apples are tender, stirring once or twice.

Remove from heat. Drain off approximately 3/4 cup of liquid and set aside. Mash apples with a potato masher. Stir in brown sugar and cinnamon.

Reserved liquid, additional brown sugar or cinnamon may be added to sauce to achieve desired taste/texture.

Chill.

Yield: about 4 cups

NOTE: I generally end up adding all the reserved liquid back because it seems to reabsorb as it chills. You can serve it at any temperature, but I prefer cold applesauce. The water can be replaced with apple juice (Martinelli’s is best!) for extra flavor.

Peanut Butter & Trail Mix Sandwich

PB and Trail Mix sandwichCostco is a dangerous place. So many delicious things and in such large quantities. I try not to go when I’m hungry or I’ll come home with mounds of unnecessary goodies that called my name, either from a sample cup or my ravenous wanderings up and down the aisles.

When we first moved to CDA, I did one of those ravenous wanderings and ended up bringing home a large package of trail mix {peanuts, almonds, M&Ms, and raisins}. We waited two weeks for our things to arrive so trail mix seemed like a decent choice since we were devoid of cookwar

Trail Mix
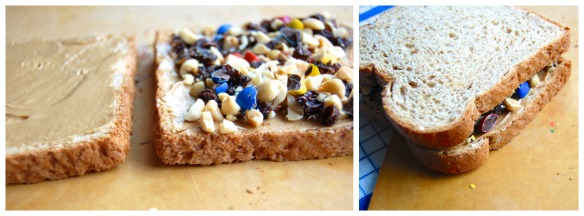
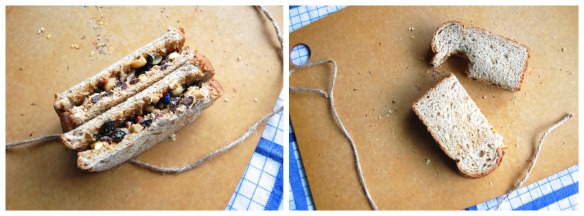
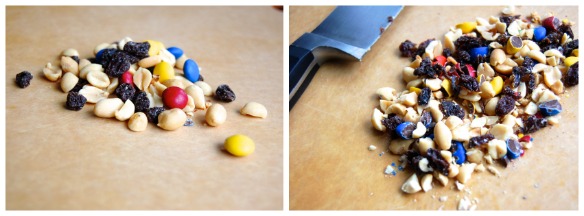
I adore that particular trail mix, especially the raisins which seem to be perfectly firm and salty. A few weeks ago, I noticed we still had the remnants of that bag of tasty trail mix. Inspiration struck at the sight of the last handful of nuts, chocolate, and dried fruit.

Seemed like peanut butter and the ingredients of that trail mix would be a wonderful combination. Most of the time I eat my peanut butter by the spoonful {we all know how I feel about peanut butter}, but my other favorite vehicle for peanut butter is toasted bread. A peanut butter and trail mix sandwich. Yes!

PB and Trail MixThe textural and flavor elements of this sandwich are addictive. Crunchy nuts, slightly salted and chewy raisins, and the crispy sweet bursts of chocolate. I used creamy peanut butter {which isn’t my norm} but crunchy would work well, too

Peanut Butter and Trail MixIf you didn’t happen to have pre mixed trail mix, create a custom mix. Raid your pantry for nuts, dried fruit, and sweets. Craisins, yogurt covered raisins, white chocolate chips, toasted pecan, or chopped macadamia nuts would be lovely in this sandwich. Get creative.

Train Mix SandwichPeanut Butter & Trail Mix Sandwich

  • 2 slices of bread, toasted
  • 2 Tablespoon peanut butter
  • 1/3 cup trail mix

Roughly chop the trail mix. Spread one piece of toast with peanut butter. Sprinkle trail mix over peanut butter. Place second piece of bread on top of trail mix. Press slightly to adhere trail mix to peanut butter.

Yield: 1 highly addictive sandwich

What’s your favorite thing to put on a peanut butter sandwich?